Documents
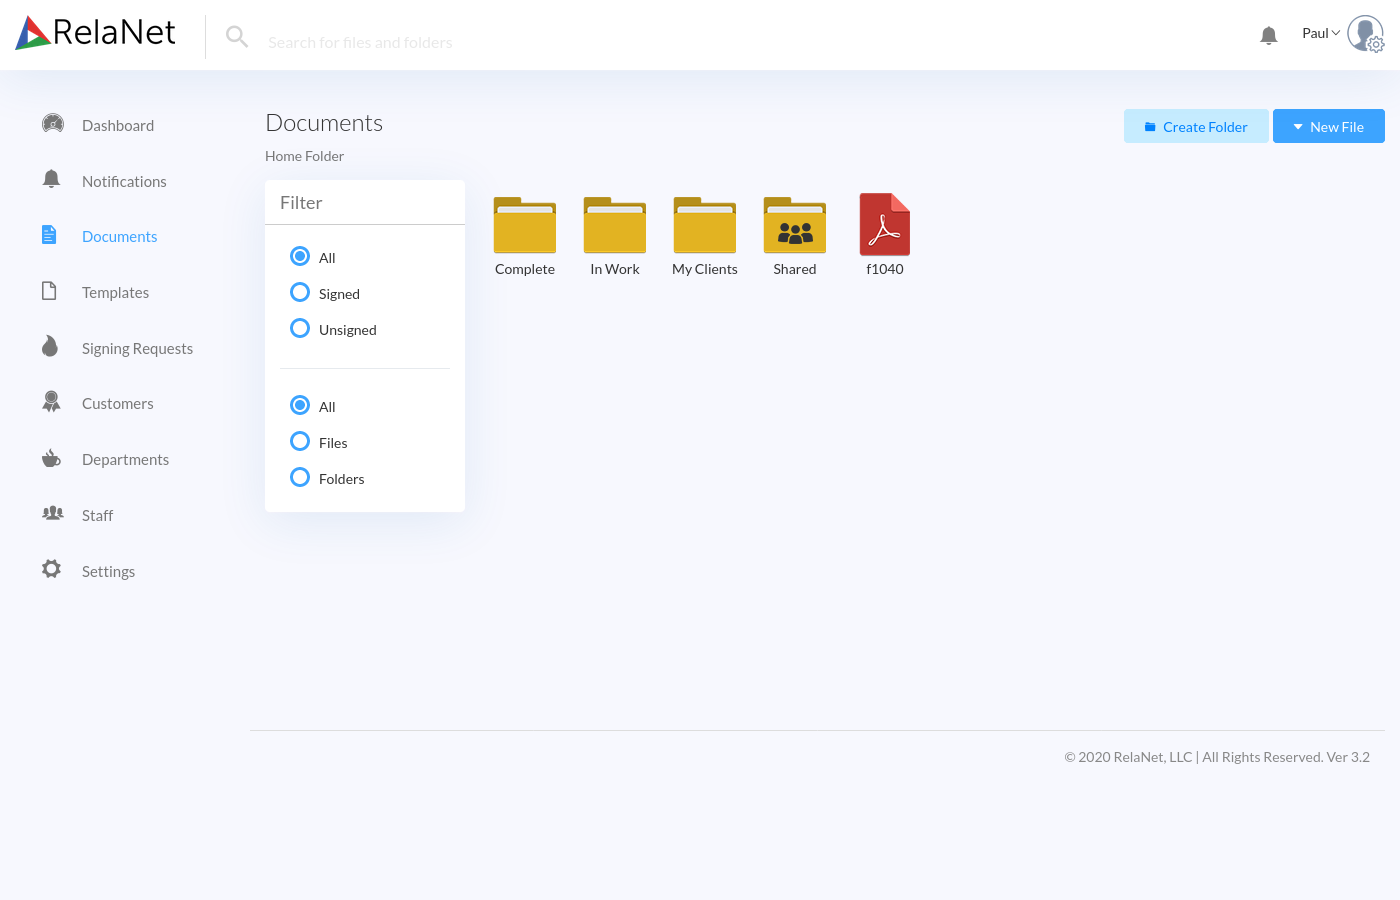
The Documents screen contains the files and folders that you can access. Files and folders might appear in the Documents screen because you created them, or because they were shared with you. To access the Documents screen, click on Documents in the sidebar.
Files
RelaNet Sign relies on many of the portability and security features that are built into the portable document format (PDF). Because of this, only PDF documents can be uploaded to RelaNet Sign. If you have documents in other formats (such as Microsoft Word) that need to be signed, we suggest you export them to PDF format so that they can be uploaded to RelaNet Sign.
Uploading a File
To upload a file to RelaNet Sign, click the New File button found at the upper right of the Documents screen. Then select Upload File from the menu that appears to present the Upload File modal screen.
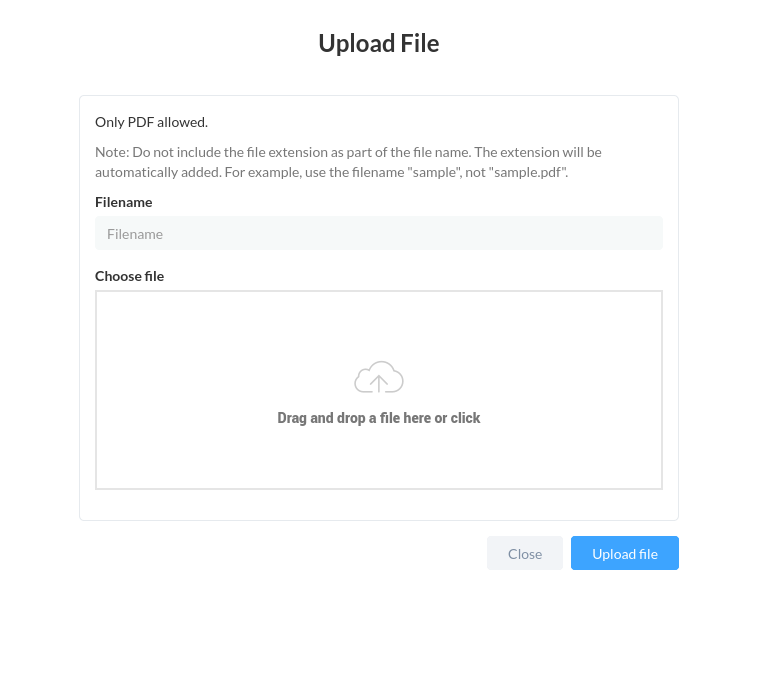
To upload a file, first enter a filename for the file. When entering a filename, please remember that the extension ".pdf" will be automatically added to the filename you provide. So if you want the file to be named "My File.pdf", you should just enter "My File". After entering a filename, select the file that you want to upload by either dragging the file's icon from your desktop to the Choose file area, or just click the Choose file area to open a file selection dialog that you can use to select the file. After entering the filename and choosing the file, click the Upload file button.
File Action Menu
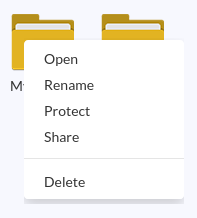
You can perform a number of basic actions on a file by right-clicking on the file's icon to open the file's action menu.
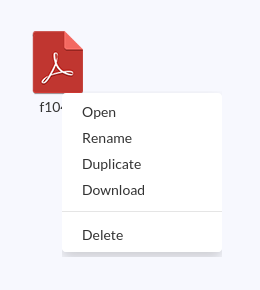
A file's action menu allows you to perform the following actions:
- Open: Open the file in the Document Detail Screen. You can also open a file by double-clicking its icon. For more information about the Document Detail Screen, see Document Details.
- Rename: Assign a new name to the file.
- Duplicate: Make a copy of the file.
- Download: Download the file to your computer.
- Delete: Delete the file from RelaNet Sign. This action is permanent and cannot be undone.
Folders
Folders are a way of collecting related files. Since folders can contain both files and other folders, you can create a hierarchy of folders to organize all your files.
Folder Icons
RelaNet Sign helps you recognize certain types of folders by using different icons.
 Normal Folders: Most folders that you encounter in RelaNet Sign will
be normal folders. Normal folders have an icon that looks like an unadorned
manila folder.
Normal Folders: Most folders that you encounter in RelaNet Sign will
be normal folders. Normal folders have an icon that looks like an unadorned
manila folder. Back Folders: Every folder automatically contains a Back folder that
you can use to go to the parent of the current folder. Double-click or open
the Back folder to return to the parent of the currently open folder. Back
folders have an icon that looks like a Normal folder emblazoned with an
arrow pointing to the left.
Back Folders: Every folder automatically contains a Back folder that
you can use to go to the parent of the current folder. Double-click or open
the Back folder to return to the parent of the currently open folder. Back
folders have an icon that looks like a Normal folder emblazoned with an
arrow pointing to the left. Shared Folders: You can share folders with other staff so that they
can access the shared folder's contents. Shared folders come with some
restrictions. Shared folders can only exist in your home directory, and can
only be shared with the company owner and staff in your organization. They
cannot be shared with customers. Once a folder is shared, every file and
folder within it is also shared. You cannot share only part of a folder. Shared
folders have an icon that looks like a Normal folder emblazoned with an
image of a group of people. If you are the recipient of a shared folder, you
can place your mouse over the icon to reveal a pop-up tooltip that identifies
the owner of the shared folder. TEAM
Shared Folders: You can share folders with other staff so that they
can access the shared folder's contents. Shared folders come with some
restrictions. Shared folders can only exist in your home directory, and can
only be shared with the company owner and staff in your organization. They
cannot be shared with customers. Once a folder is shared, every file and
folder within it is also shared. You cannot share only part of a folder. Shared
folders have an icon that looks like a Normal folder emblazoned with an
image of a group of people. If you are the recipient of a shared folder, you
can place your mouse over the icon to reveal a pop-up tooltip that identifies
the owner of the shared folder. TEAM Protected Folders: Protected folders require that a password be
entered before they are opened. Protected folders look like a Normal folder
or a Shared folder with a padlock badge.
Protected Folders: Protected folders require that a password be
entered before they are opened. Protected folders look like a Normal folder
or a Shared folder with a padlock badge.
Creating a Folder
To create a folder in RelaNet Sign, click the Create Folder button found at the upper right of the Documents screen. This will open the Create Folder modal screen.
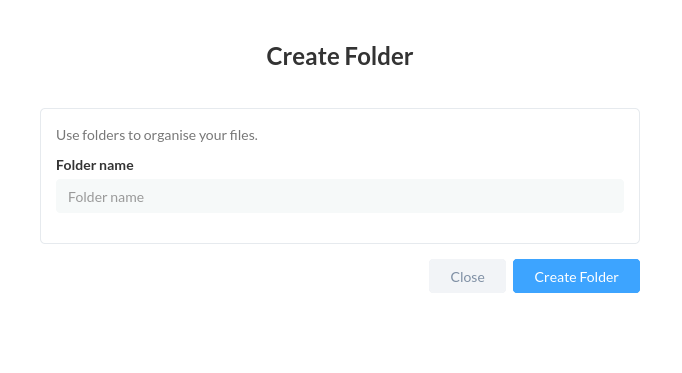
To create a folder, enter a name for the folder, then click the Create Folder button.
Folder Action Menu
You can perform a number of actions on a folder by right-clicking the folder's icon to open the folder's action menu.
A folder's action menu allows you to perform the following actions:
- Open: Open the folder and view its contents. You can also open a folder by double-clicking its icon.
- Rename: Assign a new name to the folder.
- Protect: Set a password that must be entered before the folder can be opened. This password will be required by anyone who opens the folder, including anyone the folder might be shared with.
- Share: Share the folder with other staff in your organization. Only folders in your home directory can be shared. Folders can be shared with all staff, or with particular departments. Folders cannot be shared with customer accounts. TEAM
- Delete: Delete the folder and all its contents from RelaNet Sign. This action is permanent and cannot be undone.
Moving Items to Folders
To move an item to a folder, drag the item's icon and drop it on the new parent folder. To move an item to the parent folder, drop the item's icon on the Back folder. Both files and folders can be moved in this way.
Shared folders can only exist in the home directory. If you move a shared folder to an unshared folder, the moved folder will no longer be shared.
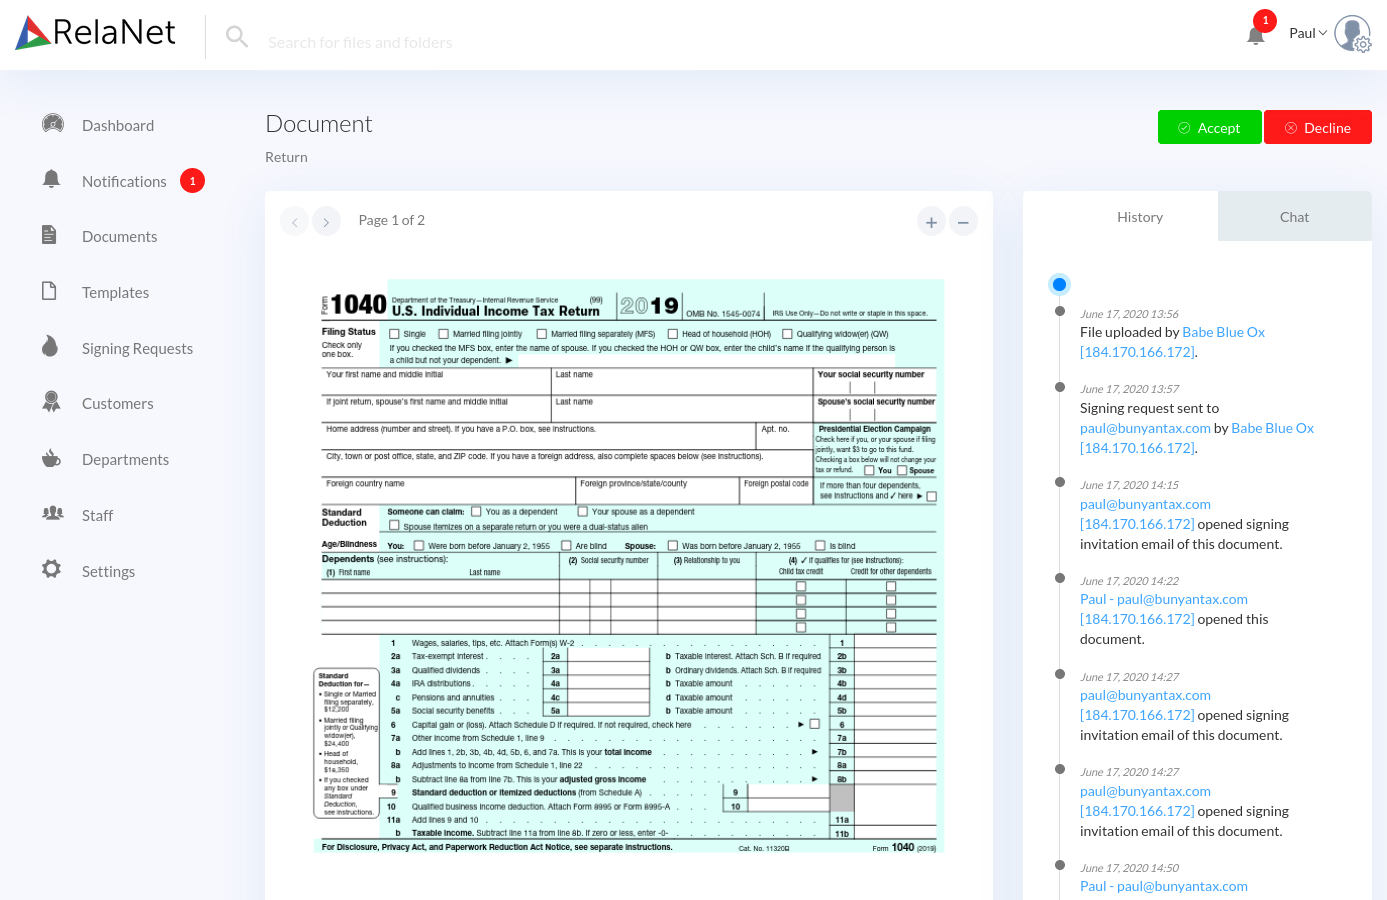
Document Details
When you open a file by double-clicking or using the Open action, the Document Details screen will be opened. The Document Details screen offers a number of controls and information views that allow you to interact with your document.
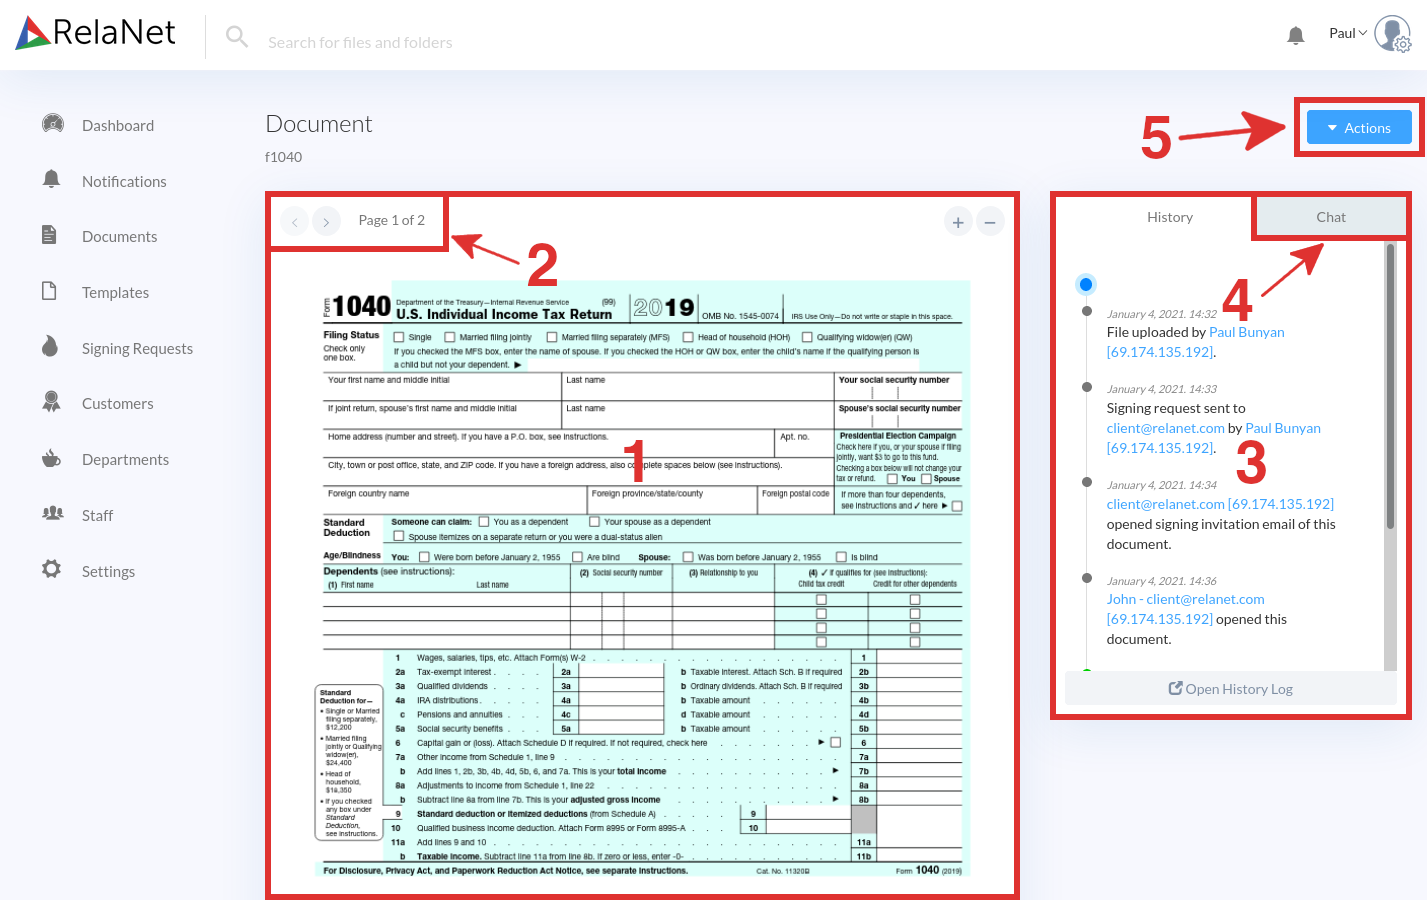
The Document Details screen contains the following major areas and controls:
- Document Preview: Shows an image of the document.
- Page Selector: Allows you to select which page of a multipage document is displayed in the Document Preview.
- Document History View: Shows an automatically generated log of all actions that have been taken on the file and related signature requests.
- Chat View: Allows you to send and receive short text messages with others who can access the file.
- Actions Button: Allows you to take actions on a file such as sending the file to someone, requesting a signature, and protecting the document. For more information about the available actions, see Document Actions.
Document Actions
You can click on the Document Details' Action button to reveal a menu of actions that can be performed on the document.
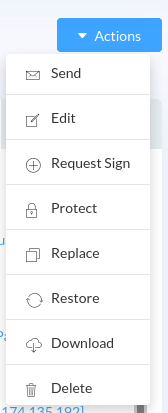
Actions that can be taken on a document include:
- Send: Send a copy of the document to recipients as an email attachment.
- Edit: Annotate the document with text, symbols, and shapes.
- Request Sign: Request that the document be signed by another person. For more information, see Requesting Signatures.
- Protect: Permanently prevent the document from being printed, and/or modified. Optionally allows you to set a password that will be required to view or change the Protect settings. Once a document has been signed by all signatories, it is suggested that you protect the file in order to make the document permanently unalterable.
- Replace: Exchange the contents of the document with those of another file that you upload.
- Restore: Exchange the contents of the document with those of the original document that was uploaded.
- Download: Download the file to your computer.
- Delete: Delete the file from RelaNet Sign. This action is permanent and cannot be undone.
Requesting Signatures
A signature request is an email invitation that asks a person to electronically sign a document in RelaNet Sign. When requesting a signature, you can choose to create a customer account for the signer (so that the signer's name appears in the document audit log), or you can instead allow the signer to sign as a guest.
To request a signature on a document, open the file's Document Details screen. Click on the Actions button, and then select Request Sign in the menu that appears. This will open the Signature Request modal screen.
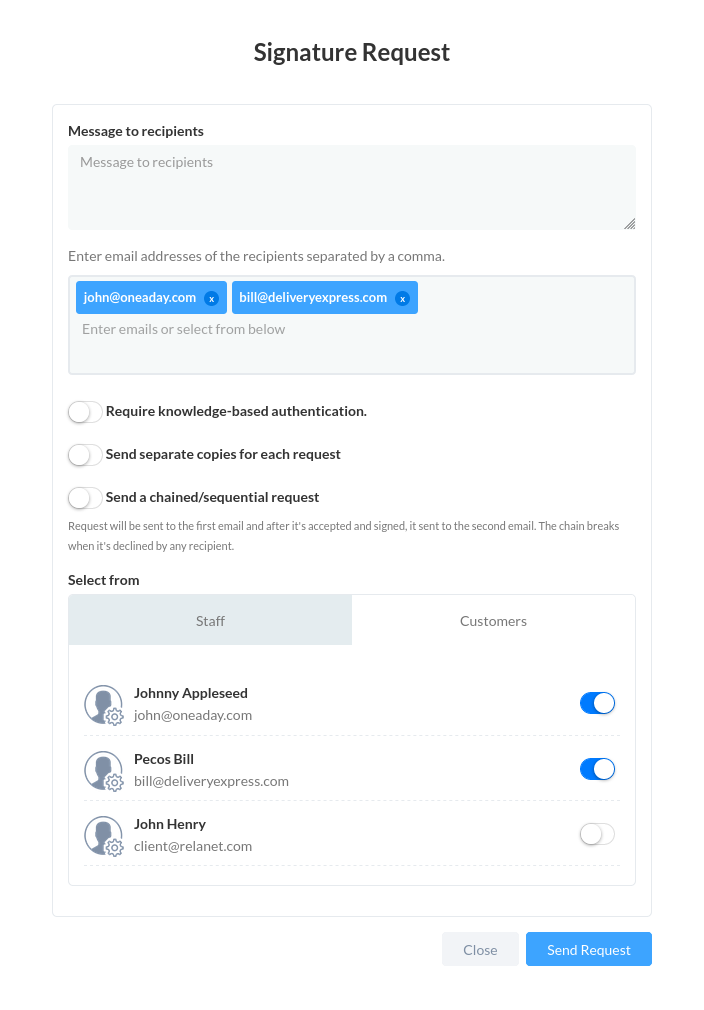
To send a signature request, first enter a message into the Message to recipients field. After entering your message, enter the email addresses of the recipients.
There are two ways to enter email addresses for a signing request:
- Select Accounts: If your signer has a RelaNet Sign account, you can select the staff or customer accounts that should receive the signature request using the selection box at the bottom of the screen. The advantage of selecting the accounts is that it protects against mistyped email addresses.
- Manual Entry: If your signer does not have a Relanet Sign account (and therefore will be signing as a guest), you will need to manually enter the signer's email address by typing it into the email address text box. When manually entering email addresses, be careful to avoid mistyping email addresses. Complete each entered email address with a comma or a tab.
When you are ready to send the signature request, click the Send Request button to open the Signature Request Annotation Screen, where you will be able to mark where the recipient should sign. For more information about the Signature Request Annotation Screen, see Signature Request Annotation Screen.
Signature Request Options
When creating a signature request, there are a few options that you can select.
- Require knowledge-based authentication: This option allows you to require knowledge-based authentication (or "KBA") for each signature requested. When you turn this option on, you will be prompted to enter the legal first name and last name of each recipient, so that their identity can be verified. In order to use knowledge-based authentication, you will need one KBA credit for each signature being requested. If you need to purchase KBA credits, please contact RelaNet support.
- Send separate copies for each request: This option is only available when more than one recipient has been entered. When you turn this option on, separate copies of the document will be created for each recipient, each with the recipient's email address appended to the filename. Recipients will be able to view and sign only their copy. Signatures applied by recipients will not be visible to other recipients. (When this option is off, the same document is sent to all recipients, and later signers will be able to see the signatures of earlier signers.)
- Send a chained/sequential request: This option is only available when more than one recipient has been entered. When you turn this option on, the signature request will be sent to recipients one at a time. The request will be sent to the first recipient and after it is accepted and signed, it will be sent to the second recipient. This process continues until all recipients have signed. If any recipient declines to sign the document, the chain will be broken and later recipients will not be sent a signature request.
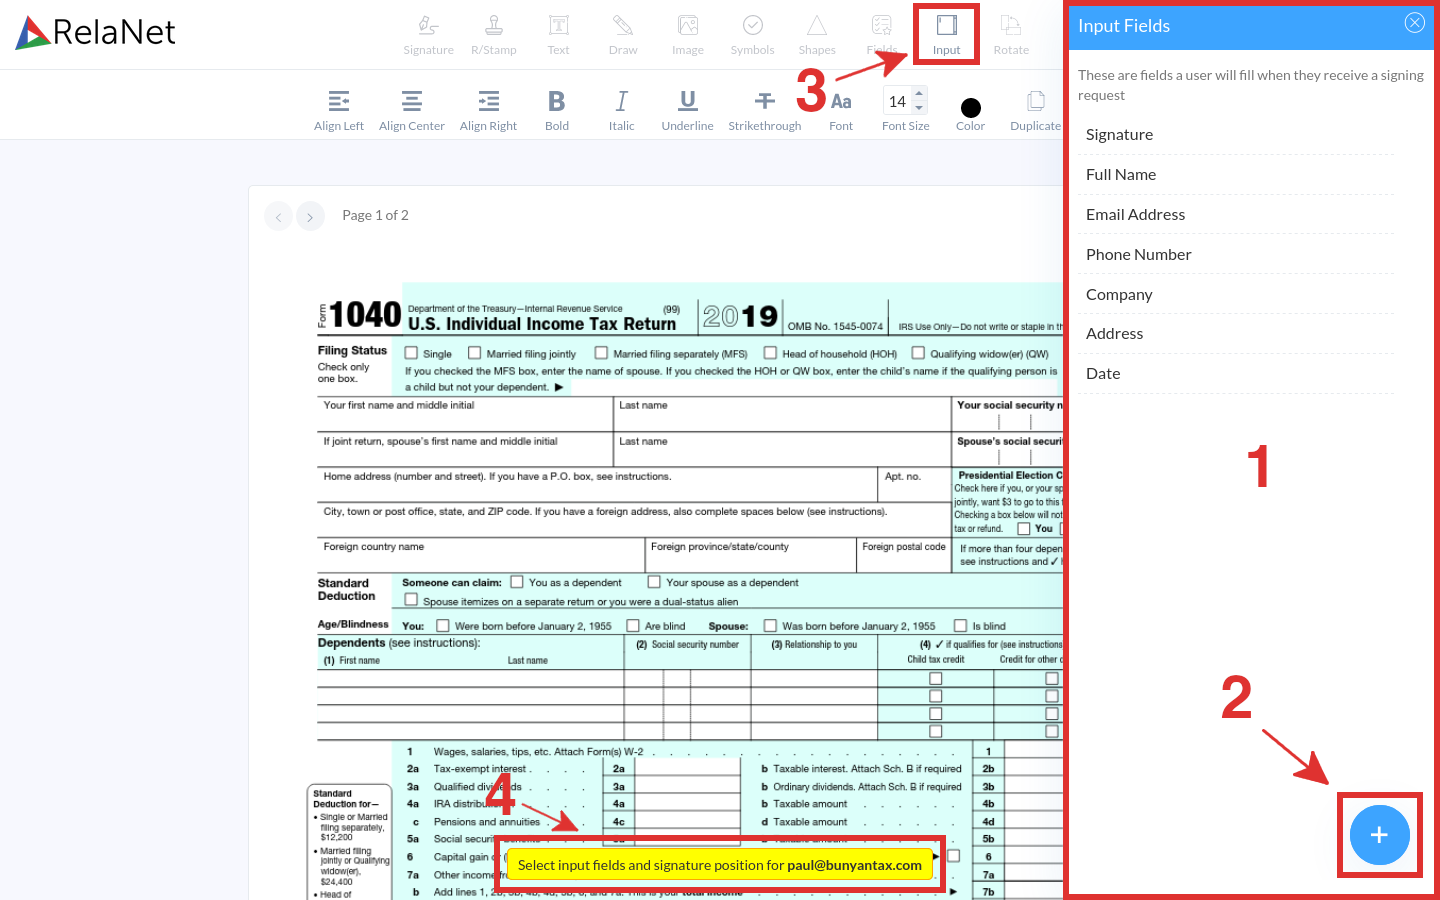
Signature Request Annotation Screen
The Signature Request Annotation screen allows the sender to indicate where recipients of the signing request should apply their signatures. It also allows the sender to request other information from signers, like their full name or email address.
After adding all necessary input fields for a recipient, click the Next button to place input fields for the next recipient. Once input fields have been placed for all signers, click the Send button to send your signature request.
The Document Details screen contains the following major areas and controls:
- Input Fields Panel: The Input Fields Panel slides in from the right and contains the different input fields that you can add to your document. The signer will be prompted to provide input for each field that was added. Each document must contain at least one Signature field per signer, which marks where recipients should sign. To place an input field, click the type of input field you would like to place (which will dismiss the Input Fields Panel), then click on the document where the input field should be placed.
- Add Input Field Button: The Add Input Field button allows you to create your own custom input fields which can be added to your documents.
- Show Input Fields Panel Button: The Show Input Fields Panel button displays the Input Fields Panel if it is not visible. If you want to add multiple input fields to your document, you will need to click this button to re-display the Input Fields Panel before adding subsequent input fields.
- Current Recipient Display: The Current Recipient Display identifies which signer will see the input fields being added. When sending a signing request to multiple recipients, click the Next button to advance to the next recipient. You can keep track of which recipient you are working on by referring to the Current Recipient Display.
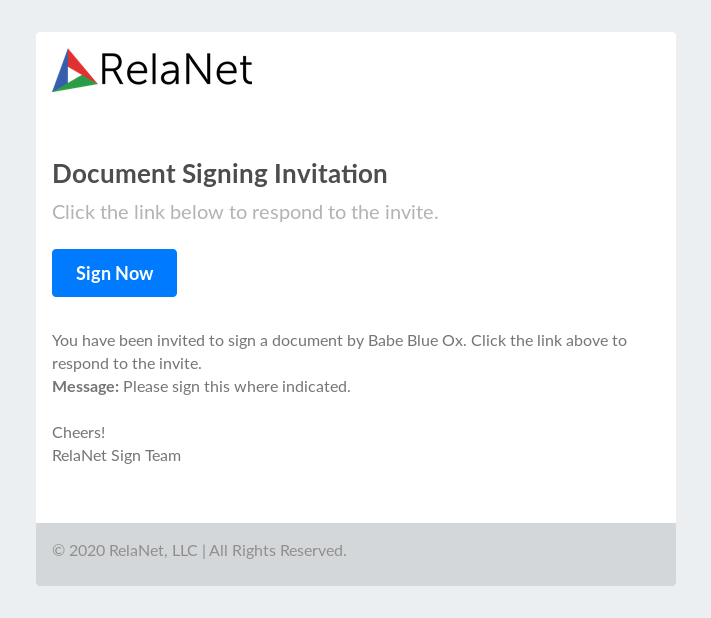
Signing Documents
When someone sends you a signature request, the request will be sent as an email. In the email you will see a message from the sender and a Sign Now button.
If you are already logged into RelaNet Sign when you click the Sign Now button, you will be taken directly to the Signature Review screen. If you are not logged in when you click the Sign Now button, will be taken to a modified login screen where you can either log into your account or click the Sign as Guest button.
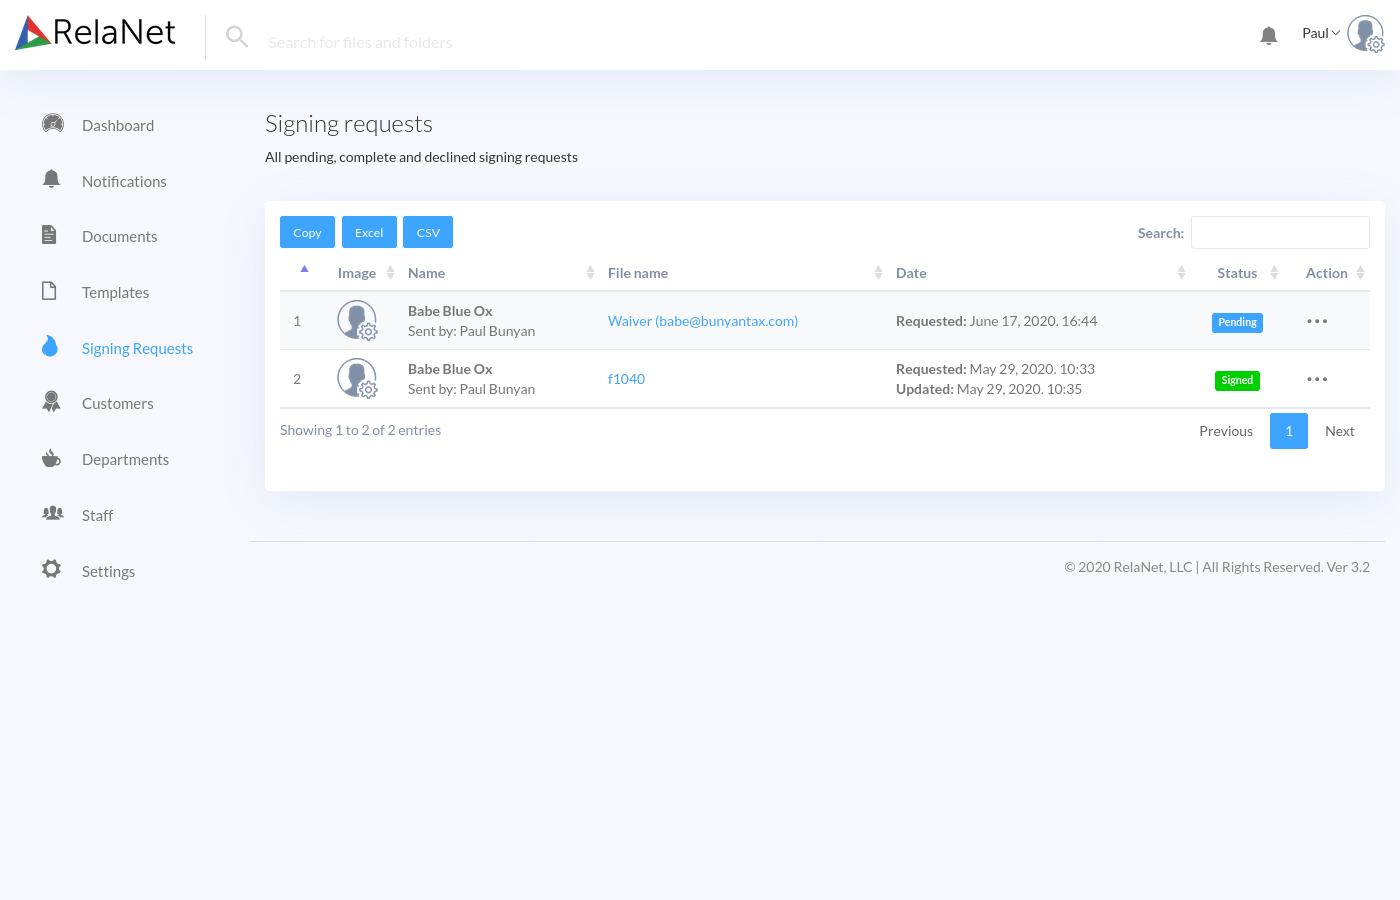
If you logged into RelaNet Sign, go to the Signing Requests screen, and then click the request's Sign Now button to open the Signature Review screen.
If you clicked the Sign as Guest button, you will be taken directly to the document's Signature Review screen.
On the Signature Review screen you will see towards the upper right corner of the screen two buttons: Accept and Decline. If after reviewing the document you decide to sign the document, click the Accept button. If you decide not to sign the document, click the Decline button.
After clicking the Accept button, you will be taken to a signature screen where you can sign the document. Find the Sign Here label that marks where you should sign, click the label, and your signature will be applied. After signing the document, click the Save button.